


Uncle_Gadget
-
Posts
71 -
Joined
Content Type
Profiles
Forums
Events
Posts posted by Uncle_Gadget
-
-
If I wanted to remove .NET 1.1 support, I could: 1) Delete the 'DNF11' folder and 2) Remove lines 63 and 64 (see below) from install.cmd, correct?
START /WAIT DNF11\netfx.msi TRANSFORMS=NETFX11SP1.MST %VERBOSITY% /norestartSTART /WAIT WaitNET.exe %VERBOSITYSHORT%
-
4.5 installer by default was GDR but I patched it with KB2519265 to change it to take LDR updates (these are non security bug fixes,) with 4.5.1 (it changed) there are 2 installers with 2 sets of files
netfx_Full_GDR_x*.msi andnetfx_Full_LDR_x*.msi
If you ONLY care about security updates you would choose the GDR, but if you want security updates and "hotfixes" from the microsoft knowledge base you should pick LDR (these will fail to install if you install the GDR)If you are using the default EXE and you want to install the LDR branch you need to use
<ndp451_installer>.exe /trainswap
BTWLDR = Limited Distribution Release (same as QFE = Quick Fix Engineering)
GDR = General Distribution Release
Rick,
I'm not certain I follow the above. What do I do if I only want the GDR version? Is there a separate installer available?
-
Fantastic, Rick! I'm looking forward to giving it a test drive later this week.
-
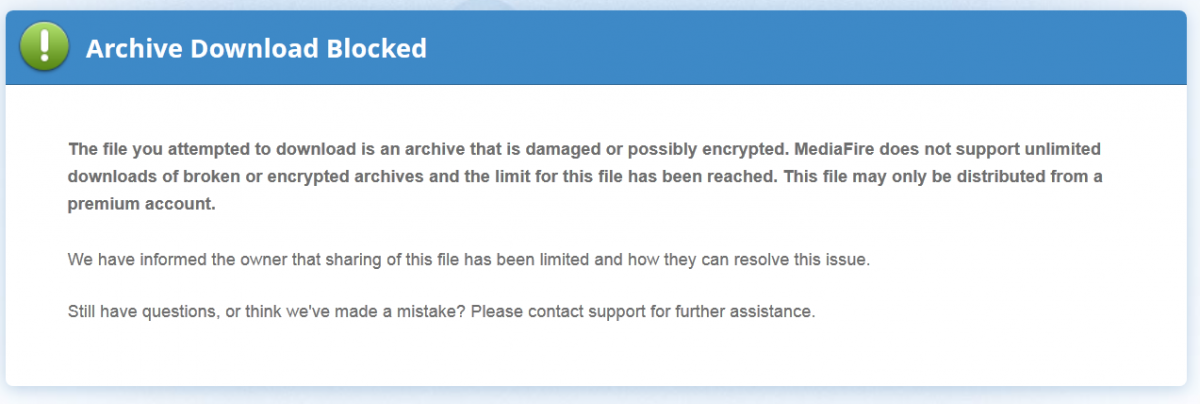
Still blocked for me on IE9, FF19.0, and Chrome 25. It probaly works for you since you're logged into your account. Here's the link that returns in every case:
http://www.mediafire.com/error.php?errno=393
Here's what's displayed:

-
It appears that MediaFire is blocking the download link :rtfm: . Anxiously awaiting your fix.... :doh:
-
If anyone's interested, I wrote a fairly sophisticated AutoIt script to add/remove to/from %PATH% using the registry.
If you run it silently, it will generate an ERRORLEVEL if it encounters any errors while executing. Feel free to use or modify as needed.
#region ;**** Directives created by AutoIt3Wrapper_GUI ****
#AutoIt3Wrapper_Outfile=C:\Users\Public\Desktop\Uninstall.exe
#AutoIt3Wrapper_Compression=4
#AutoIt3Wrapper_UseX64=n
#AutoIt3Wrapper_Res_Description=Append or Remove elements from %PATH%
#AutoIt3Wrapper_Res_Fileversion=1.0.0.16
#AutoIt3Wrapper_Res_Fileversion_AutoIncrement=p
#AutoIt3Wrapper_Res_Language=1033
#AutoIt3Wrapper_Res_requestedExecutionLevel=requireAdministrator
#AutoIt3Wrapper_Res_Field=ProductName|PATH Appender-Remover
#AutoIt3Wrapper_Res_Field=ProductVersion|1.0
#AutoIt3Wrapper_AU3Check_Stop_OnWarning=y
#AutoIt3Wrapper_Run_Tidy=y
#endregion ;**** Directives created by AutoIt3Wrapper_GUI ****
#cs ----------------------------------------------------------------------------
AutoIt Version: 3.3.8.1
Author:		 Uncle Gadget
Script Function:
This script will appends or remove elements from the %PATH% Environment
#ce ----------------------------------------------------------------------------
Local $Silent, $NewRegPath

Global $CommandError = "Uninstall.exe <a/r/as/rs> <path to append/remove>" & @LF & @LF & _
		"	a = Append to existing %PATH%" & @LF & _
		"	r = Remove from existing %PATH%" & @LF & @LF & _
		"	as = Append (silently) to existing %PATH%" & @LF & _
		"	rs = Remove (silently) from existing %PATH%"


If $CmdLine[0] <> 2 Then; not enough Command Line parameters were entered
	MsgBox(262160, "Command Line Error (1)", "Uninstall.exe expects parameters to be as follows:" & @LF & @LF & _
			$CommandError)
	Exit 1
EndIf

Global $Path = StringStripWS($CmdLine[2], 3) ; Strip all White Space from Begin and End of Command Line (2)

Global $Command = StringLower(StringStripWS($CmdLine[1], 3))

Local $RegPath = RegRead("HKLM\SYSTEM\CurrentControlSet\Control\Session Manager\Environment", "Path")

Switch $Command
	Case "as" ; (a)ppend / (s)ilent
		$Silent = 1 ; Turns on the Silent (No Output) Flag to eliminate any user output
		ContinueCase ; Continue on to Append below


	Case "a" ; (a)ppend
		Opt("ExpandEnvStrings", 1) ; Turns ON Expanded Environment Strings
		If Not FileExists($Path) Then ; the requested Path to Append/Remove does not exist - ERROR
			If Not $Silent Then ; we'll let User know about error if 's'ilent was NOT specified
				MsgBox(262160, "Path Does Not Exist (2)", "The Path to append (below) does not currently exist." & @LF & @LF & _
						$Path & @LF & @LF & _
						"Verify that Path exists prior to execution.")
			EndIf
			Exit 1
		EndIf

		$LowerPath = StringLower($Path)
		$LowerRegPath = StringLower($RegPath)
		$ExpPathLen = StringLen(";" & $Path)
		Opt("ExpandEnvStrings", 0) ; Turns OFF Expanded Environment Strings

		If $LowerPath & ";" = StringLeft($LowerRegPath, $ExpPathLen) Or StringInStr($LowerRegPath, ";" & $LowerPath & ";") Or ";" & $LowerPath = StringRight($LowerRegPath, $ExpPathLen) Then ; the path to remove is currently somewhere in %PATH%
			If Not $Silent Then ; we'll let User know that Path to Append currently exists in %PATH%
				MsgBox(262208, "Path Currently Exists (3)", "The Path to append (below) is currently specified in %PATH%." & @LF & @LF & _
						$Path & @LF & @LF & _
						"No changes will be made to the %PATH%.")
			EndIf
			Exit 0 ; Although no changes were necessary we'll exit with no error since our mission WAS accomplished
		EndIf

		$AppendWrite = RegWrite("HKLM\SYSTEM\CurrentControlSet\Control\Session Manager\Environment", "Path", "REG_EXPAND_SZ", $RegPath & ";" & $Path)
		If Not $AppendWrite Then ; some sort of error occurred while writing
			If Not $Silent Then ; we'll let User know about error if 's'ilent was NOT specified
				MsgBox(262160, "Registry Write Error (4)", "Unable to write appended %PATH% to the registry." & @LF & @LF & _
						"Error Code Returned was: " & @error & @LF & @LF & _
						"Review command line options before trying again.")
			EndIf
			Exit 1
		EndIf

		If Not $Silent Then ; we'll let the User know that all changes have been made as requested.
			MsgBox(262208, "Path Successfully Appended", "The path (below) was successfully appended to %PATH%." & @LF & @LF & _
					$Path)
		EndIf

		EnvUpdate()

		Exit 0


	Case "rs" ; ®emove / (s)ilent
		$Silent = 1 ; Turns on the Silent (No Output) Flag to eliminate any user output
		ContinueCase ; Continue on to Remove below


	Case "r" ; ®emove
		$PathLen = StringLen(";" & $Path)

		If $Path & ";" = StringLeft($RegPath, $PathLen) Then ; the path to remove is at the BEGINNING of %PATH%
			$NewRegPath = StringTrimLeft($RegPath, $PathLen) ; and we'll create the new %PATH% String by Trimming of the beginning of %PATH%

		ElseIf StringInStr($RegPath, ";" & $Path & ";") Then ; the path to remove is in the MIDDLE of %PATH%
			$NewRegPath = StringReplace($RegPath, ";" & $Path & ";", ";") ; and we'll create the new %PATH% String

		ElseIf ";" & $Path = StringRight($RegPath, $PathLen) Then ; the path to remove is at END of %PATH%
			$NewRegPath = StringTrimRight($RegPath, $PathLen) ; and we'll create the new %PATH% String by trimming off the end of %PATH%

		Else ; the path to remove is NOT in current %PATH% and we can't make any changes
			If Not $Silent Then ; we'll let User know about error if 's'ilent was NOT specified
				MsgBox(262160, "Path Removal Error(5)", "The Path specified for removal (below) does not exist in current %PATH%." & @LF & @LF & _
						$Path & @LF & @LF & _
						"Review command line options before trying again.")
			EndIf
			Exit 1
		EndIf

		$RemoveWrite = RegWrite("HKLM\SYSTEM\CurrentControlSet\Control\Session Manager\Environment", "Path", "REG_EXPAND_SZ", $NewRegPath)

		If Not $RemoveWrite Then ; some sort of error occurred while writing
			If Not $Silent Then ; we'll let User know about error if 's'ilent was NOT specified
				MsgBox(262160, "Registry Write Error (6)", "Unable to write removed %PATH% to the registry." & @LF & @LF & _
						"Error Code Returned was: " & @error & @LF & @LF & _
						"Review command line options before trying again.")
			EndIf
			Exit 1
		EndIf

		If Not $Silent Then ; we'll let the User know that all changes have been made as requested.
			MsgBox(262208, "Path Successfully Removed", "The path (below) was successfully removed from %PATH%." & @LF & @LF & _
					$Path)
		EndIf

		EnvUpdate()

		Exit 0

	Case Else ; an invalid parameter was entered
		MsgBox(262160, "Invalid Command option (7)", "Uninstall expects parameters to be as follows:" & @LF & @LF & _
				$CommandError)
		Exit 1
EndSwitch -
I was doing a bit more research and found the Registry Data Types below. Is there a difference between NOCLOBBER and APPEND?
; REG_MULTI_SZ_APPEND = 0x0001000A
; REG_MULTI_SZ_NOCLOBBER = 0x00010002
I know it doesn't help me with a REG_EXPAND_SZ, but wouldn't the line below work as an uninstall data type for REG_MULTI_SZ?
; REG_MULTI_SZ_DELVAL = 0x00010006
-
Ive struggled with this too, I can get append (0x10008) to add but never could figure out the uninstall
Thanks. Even this helps. I'll probably write a simple AutoIt executable and execute it during RunPostSetupCommands=
-
Once again I'm stuck on an inf problem. Does anyone know of a way to append to the %PATH% using an INF installer?
I know that the path is stored in the registry at:
HKLM,"SYSTEM\CurrentControlSet\Control\Session Manager\Environment","Path"
And I know it would be easy to replace the path. The question is can I append to the existing path in the registry?
And, then, to really complicate matters... Would there be a way to uninstall the appended path portion ONLY on an uninstall? I'm probably asking for too much, now. :albert:
-
Rick, I've written my own Runtime installer and recently added the ability to uninstall older versions in the process. While I'm certain what I'm sharing is probably not new to you, I thought I'd pass it along, just in the off chance you might be able to use it. Below is the installer script I'm using. The GUID's were gathered through looking through old verions and are by no means exhaustive:
;Standard Dialog Box Installation
RunProgram="hidcon:cmd /c FOR %i IN (837b34e3-7c30-493c-8f6a-2b0f04e2912c,a0fe116e-9a8a-466f-aee0-625cb7c207e3,710f4c1c-cc18-4c49-8cbf-51240c89a1a2) Do MsiExec /qn /X{%i}"
RunProgram="fm20:VC2005x86\\vcredist.msi /qb! /norestart"
RunProgram="hidcon:cmd /c FOR %i IN (4532C7B4-CD32-3BD0-98DB-8E8F2FB03068,86CE85E6-DBAC-3FFD-B977-E4B79F83C909,9BE518E6-ECC6-35A9-88E4-87755C07200F) Do MsiExec /qn /X{%i}"
RunProgram="VC2008x86\\vc_red.msi /qb! /norestart"
RunProgram="hidcon:cmd /c FOR %i IN (F0C3E5D1-1ADE-321E-8167-68EF0DE699A5) Do MsiExec /qn /X{%i}"
RunProgram="VC2010x86\\vc_red.msi /qb! /norestart"
RunProgram="x64:hidcon:cmd /c FOR %i IN (6ce5bae9-d3ca-4b99-891a-1dc6c118a5fc,aac9fcc4-dd9e-4add-901c-b5496a07ab2e,ad8a2fa1-06e7-4b0d-927d-6e54b3d31028) Do MsiExec /qn /X{%i}"
RunProgram="x64:VC2005x64\\vcredist.msi /qb! /norestart"
RunProgram="x64:hidcon:cmd /c FOR %i IN (600A3A08-2D14-3D53-AEC1-2A2B23FDF928,8338783A-0968-3B85-AFC7-BAAE0A63DC50,5FCE6D76-F5DC-37AB-B2B8-22AB8CEDB1D4) Do MsiExec /qn /X{%i}"
RunProgram="x64:VC2008x64\\vc_red.msi /qb! /norestart"
RunProgram="x64:hidcon:cmd /c FOR %i IN (1D8E6291-B0D5-35EC-8441-6616F567A0F7) Do MsiExec /qn /X{%i}"
RunProgram="x64:VC2010x64\\vc_red.msi /qb! /norestart"
;-ai Fully Silent Installer
AutoInstall="hidcon:cmd /c FOR %i IN (837b34e3-7c30-493c-8f6a-2b0f04e2912c,a0fe116e-9a8a-466f-aee0-625cb7c207e3,710f4c1c-cc18-4c49-8cbf-51240c89a1a2) Do MsiExec /qn /X{%i}"
AutoInstall="VC2005x86\\vcredist.msi /qn /norestart"
AutoInstall="hidcon:cmd /c FOR %i IN (4532C7B4-CD32-3BD0-98DB-8E8F2FB03068,86CE85E6-DBAC-3FFD-B977-E4B79F83C909,9BE518E6-ECC6-35A9-88E4-87755C07200F) Do MsiExec /qn /X{%i}"
AutoInstall="VC2008x86\\vc_red.msi /qn /norestart"
AutoInstall="hidcon:cmd /c FOR %i IN (F0C3E5D1-1ADE-321E-8167-68EF0DE699A5) Do MsiExec /qn /X{%i}"
AutoInstall="VC2010x86\\vc_red.msi /qn /norestart"
AutoInstall="x64:hidcon:cmd /c FOR %i IN (6ce5bae9-d3ca-4b99-891a-1dc6c118a5fc,aac9fcc4-dd9e-4add-901c-b5496a07ab2e,ad8a2fa1-06e7-4b0d-927d-6e54b3d31028) Do MsiExec /qn /X{%i}"
AutoInstall="x64:VC2005x64\\vcredist.msi /qn /norestart"
AutoInstall="x64:hidcon:cmd /c FOR %i IN (600A3A08-2D14-3D53-AEC1-2A2B23FDF928,8338783A-0968-3B85-AFC7-BAAE0A63DC50,5FCE6D76-F5DC-37AB-B2B8-22AB8CEDB1D4) Do MsiExec /qn /X{%i}"
AutoInstall="x64:VC2008x64\\vc_red.msi /qn /norestart"
AutoInstall="x64:hidcon:cmd /c FOR %i IN (1D8E6291-B0D5-35EC-8441-6616F567A0F7) Do MsiExec /qn /X{%i}"
AutoInstall="x64:VC2010x64\\vc_red.msi /qn /norestart"
;!@InstallEnd@!
Below is the list I'm maintaining of current and previous GUID's. This is what I used in preparing my installer.
{837b34e3-7c30-493c-8f6a-2b0f04e2912c} Microsoft Visual C++ 2005 Redistributable - x86 8.0.50727.4053
{a0fe116e-9a8a-466f-aee0-625cb7c207e3} Microsoft Visual C++ 2005 Redistributable - x86 8.0.50727.5592
{710f4c1c-cc18-4c49-8cbf-51240c89a1a2} Microsoft Visual C++ 2005 Redistributable - x86 8.0.50727.6195
{710f4c1c-cc18-4c49-8cbf-51240c89a1a2} Microsoft Visual C++ 2005 Redistributable - x86 8.0.50727.6229
{6ce5bae9-d3ca-4b99-891a-1dc6c118a5fc} Microsoft Visual C++ 2005 Redistributable - x64 8.0.50727.4053
{aac9fcc4-dd9e-4add-901c-b5496a07ab2e} Microsoft Visual C++ 2005 Redistributable - x64 8.0.50727.5592
{ad8a2fa1-06e7-4b0d-927d-6e54b3d31028} Microsoft Visual C++ 2005 Redistributable - x64 8.0.50727.6195
{ad8a2fa1-06e7-4b0d-927d-6e54b3d31028} Microsoft Visual C++ 2005 Redistributable - x64 8.0.50727.6229
{4532C7B4-CD32-3BD0-98DB-8E8F2FB03068} Microsoft Visual C++ 2008 Redistributable - x86 9.0.30729.5558
{86CE85E6-DBAC-3FFD-B977-E4B79F83C909} Microsoft Visual C++ 2008 Redistributable - x86 9.0.30729.5570
{9BE518E6-ECC6-35A9-88E4-87755C07200F} Microsoft Visual C++ 2008 Redistributable - x86 9.0.30729.6161
{9BE518E6-ECC6-35A9-88E4-87755C07200F} Microsoft Visual C++ 2008 Redistributable - x86 9.0.30729.6225
{9BE518E6-ECC6-35A9-88E4-87755C07200F} Microsoft Visual C++ 2008 Redistributable - x86 9.0.30729.6276
{600A3A08-2D14-3D53-AEC1-2A2B23FDF928} Microsoft Visual C++ 2008 Redistributable - x64 9.0.30729.5558
{8338783A-0968-3B85-AFC7-BAAE0A63DC50} Microsoft Visual C++ 2008 Redistributable - x64 9.0.30729.5570
{5FCE6D76-F5DC-37AB-B2B8-22AB8CEDB1D4} Microsoft Visual C++ 2008 Redistributable - x64 9.0.30729.6161
{5FCE6D76-F5DC-37AB-B2B8-22AB8CEDB1D4} Microsoft Visual C++ 2008 Redistributable - x64 9.0.30729.6225
{5FCE6D76-F5DC-37AB-B2B8-22AB8CEDB1D4} Microsoft Visual C++ 2008 Redistributable - x64 9.0.30729.6276
{F0C3E5D1-1ADE-321E-8167-68EF0DE699A5} Microsoft Visual C++ 2010 Redistributable - x86 10.0.40219.1
{F0C3E5D1-1ADE-321E-8167-68EF0DE699A5} Microsoft Visual C++ 2010 Redistributable - x86 10.0.40219.325
{F0C3E5D1-1ADE-321E-8167-68EF0DE699A5} Microsoft Visual C++ 2010 Redistributable - x86 10.0.40219.380
{1D8E6291-B0D5-35EC-8441-6616F567A0F7} Microsoft Visual C++ 2010 Redistributable - x64 10.0.40219.1
{1D8E6291-B0D5-35EC-8441-6616F567A0F7} Microsoft Visual C++ 2010 Redistributable - x64 10.0.40219.325
{1D8E6291-B0D5-35EC-8441-6616F567A0F7} Microsoft Visual C++ 2010 Redistributable - x64 10.0.40219.380
-
I can confirm the problem!
On restart Temp-folder changes back to default, mount-folder stays modified; Setting.txt is NOT write-protected.
I want to have Temp- and Mount-folder on D:\ (C:\ is a SSD ); if I modify Temp to D:\, Win Toolki writes Win Toolki twice, i.e. D:\Win Toolkit\Win Toolkit.
MfG, Thiersee
What folder are you trying to change it to? and what folder is your mount folder set to be? Does it revert back straight away or everytime you open Win Toolkit?
Sorry for not getting back sooner... I'm having the same issues as Thiersee, above. I've tried changing the Temp folder to "D:\Temp", "D:\WinToolkit", "D:\Temp\WinToolkit", and "D:\WinToolkit\Temp". I've even tried manually editing Settings.txt to these same folders. However, once I start Win Toolkit, it reverts back to "C:\WinToolkit" every single time. I have also verified that setttings.txt is not read-only.
It doesn't change back until the program is restarted, but I have not tested it further because my concern is that it's going to use the C: drive no matter what the setting for "Win Toolkit Temp Folder" shows in the dialog.
I have Win Toolkit installed in "D:\AIO\Win ToolKit" and my mount folder is set to "D:\AIO\Mount"
Thanks for looking into the problem!
-
I've tried changing the "Win Toolkit Temp Folder" to a folder (I've tried several) on my drive D: and it ALWAYS reverts back to "C:\WinToolkit" every time I start the program.
It's critical for me that Win Toolkit not use drive C: as it's an SSD drive on my system.
-
No, my "clean" slim msi's dont have anything done to them but slimming...you have to apply the WUFixClient.mst to both "core" installers (and of course the MSP updates,) also add the KB2468871 MSP stub to install with both core+extended installers
I guess it's probably best for me just to wait until you do the updates. Thanks, again.
-
You can 7zsplit it and repack it to your needs with langpack, without extended, etc
Just to clarify, then.... The CleanSlimMSIs.7z contains the same msi's as Solor's dotNetFx40_Full_x86_x64_Slim.7z - with the exception that you have PRE-added the registry entries into the his msi's?
So, if I replace Solor's msi's with your Clean MSI's, download the updates from Solor, and run his ApplyHotfixes.cmd, I should end up with basically the same result as using your slim installer from the OP? Do I have that correct?
-
And YES its better if you use the installer, all the work is done already. But if you wish to learn how to make it yourself I provide all the tools
I've learned a ton of stuff from you in the past. This time, though, I think I'll just take the easy way out and download the ready-made version. :dancing:
Thanks, again, for all you do in the community! :worthy:
-
Ricktendo,
Thanks for the work you do on this. I have one question, though. In the version you post here on the site, ti contains the following files in the main folder:
KB2468871-v2-x64.msp
KB2468871-v2-x86.msp
However, when I create my own version using dotNetFx40_Full_x86_x64_Slim.7z from Solor's site, it does not create these two files. Can you explain the discrepancy?
Am I better off using your version or did I miss a step?
-
Thanks for the updates, Rick. However, I'm unable to download. I keep getting the following error:
Error (509)
This account's public links are generating too much traffic and have been temporarily disabled!
-
Thanks for your continued work on this project, Rick.Updated
Updated the sfx maker: added /qb! switch to remove the cancel button from the msi gui install and updated the 7zsd.sfx to the latest stable version
Also added a VBS Slimmer script (thanks to dumpydooby) for .net 4, 4.5 and should also work on any of the LP's
I noticed that you didn't modify the manifest of the sfx to "requireAdministrator" or use the MiscFlags="4" in config.txt. The result is that the installer does not execute with Admin privileges and will fail on a UAC enabled system if it's not manually started as an Administrator.
Just thought I'd make you aware in case this wasn't by design.
-
Using "Apply Unattend": Applies an Unattend.xml file to the image:
Thanks for the reply and explanation. I'm still having difficulty understanding what it means to 'apply' an unattend.xml, even after reading.
I've been successfully writing my own Autounattend.xml (and verifying with SIM) and placing it in the root folder before I use W7T to build the ISO. Everything works exactly as expected. What I'm having difficulty understanding is, how that process differs from 'Applying an unattend.xml' to an image. It sounds like they both do the same thing, but I can't actually detect what 'applying' does. Does it simply make changes directly to the install.wim? Is there a way to view the changes that are made?
Sorry for the dumb questions, everything else seems to be working as expected.
-
I noticed that my Autounattend.xml placed in the root of the .iso is no longer being used. I think it's because I inadvertently used the "Apply Unattended" feature. However, I can't seem to figure out what's going on in my install.
Can you explain what happens when you select "Apply Unattended" under the AIO Tool > Options Menu? Hopefully I can find the source of my troubles with this info.
-
Thanks for the prompt replies and the awesome tool!
-
Awesome! I would prefer to do all in one pass as well, but I have different requirements for different systems (laptop, desktop, etc.)Should be fine, but there is nothing wrong with doing everything in one go, it does its work in the correct order
As a follow up, If I enable (tick) a certain tweak on the first pass and it's not specifically selected (ticked) on a subsequent pass, will the tweak no longer apply?
To be even more specific, If I select "Show 'Computer' on Desktop" on pass 1 and it's not selected on a subsequent pass, will 'Computer' still show on the Desktop?
-
The way I would like to use W7T is to:
- Make a first pass with the AIO tool to integrate updates, remove certain components (that are never used: Tablet, XPS, etc.), and apply some common tweaks. This image would become the base for all subsequent images.
- Using the image from above, install basic software and system customizations in SysPrep - then capture the image.
- Using the captured image from #2 above, I would run the image through W7T, again, using the Component Removal Tool and, perhaps, make further tweaks, add drivers, adjust services, add themes, Gadgets, etc. with the AIO tool.
- Then, after applying Autounattend.xml, install the OS.
My question is, is this an acceptable method for using this tool? Are there any dangers or pitfalls when running an image through W7T 2, or more, times? The main benefit, of course, is that I only have to make the "updates" pass one time for potentially numerous builds and installs.
- Make a first pass with the AIO tool to integrate updates, remove certain components (that are never used: Tablet, XPS, etc.), and apply some common tweaks. This image would become the base for all subsequent images.
-
That's fine, I just wanted to know what was being shared. Thanks!Information such as what windows you are using, which version of W7T and the error message, also AIO tool adds what you added. No personal information is uploaded, just stuff which will help me fix errors. If it makes you feel any better you can turn them off and i delete them regularly (each new version).
[Legacy] .NET Framework AIO for XP x86 (1-10-2016)
in Installer Repacks
Posted
I'd be completely lost without it, Rick. It's definitely used and appreciated by me!