_14e30a.png)
_8126ce.png)

gabrielrr
Members
-
Joined
-
Last visited
-
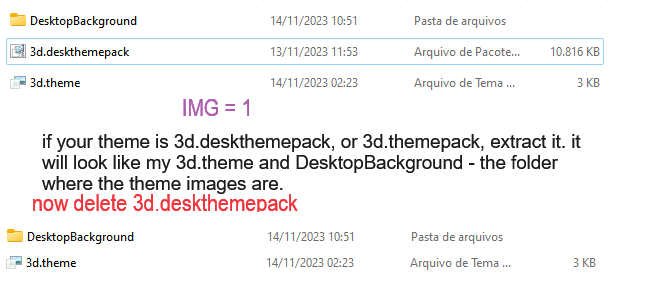
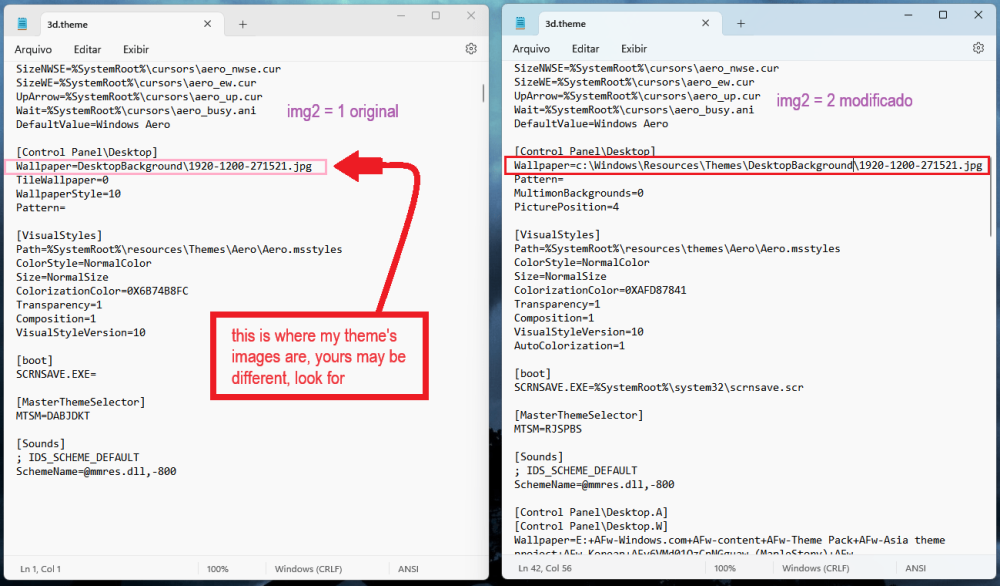
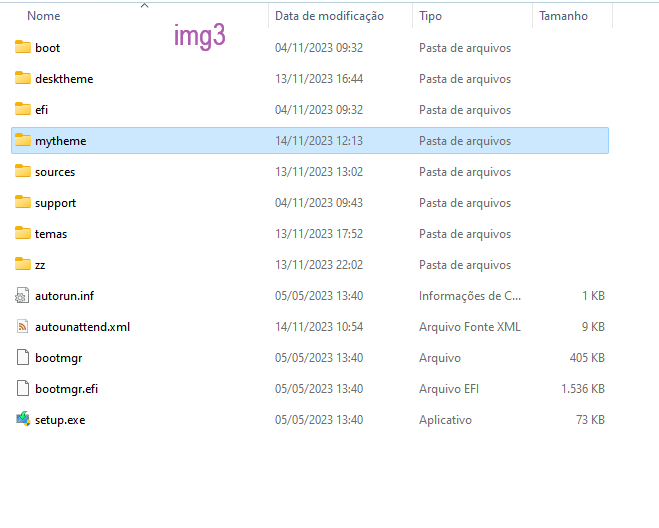
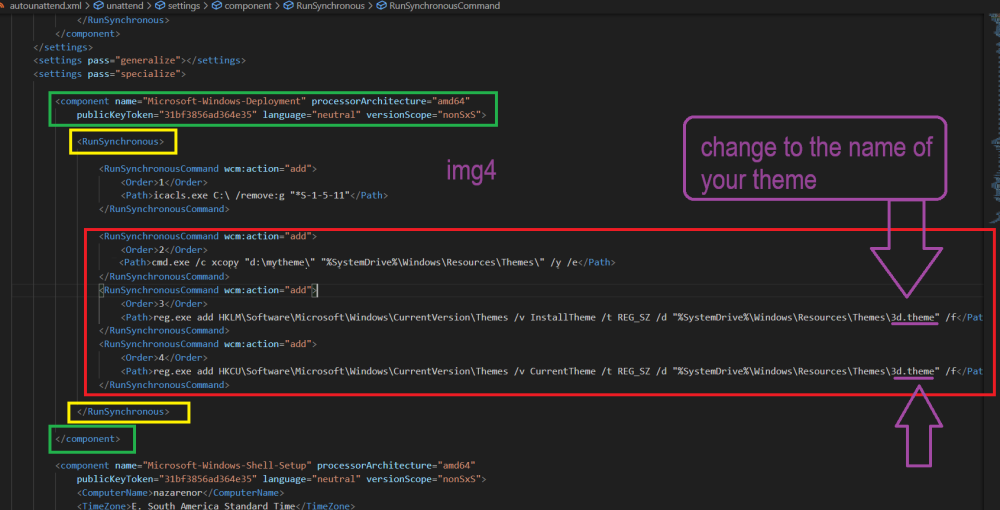
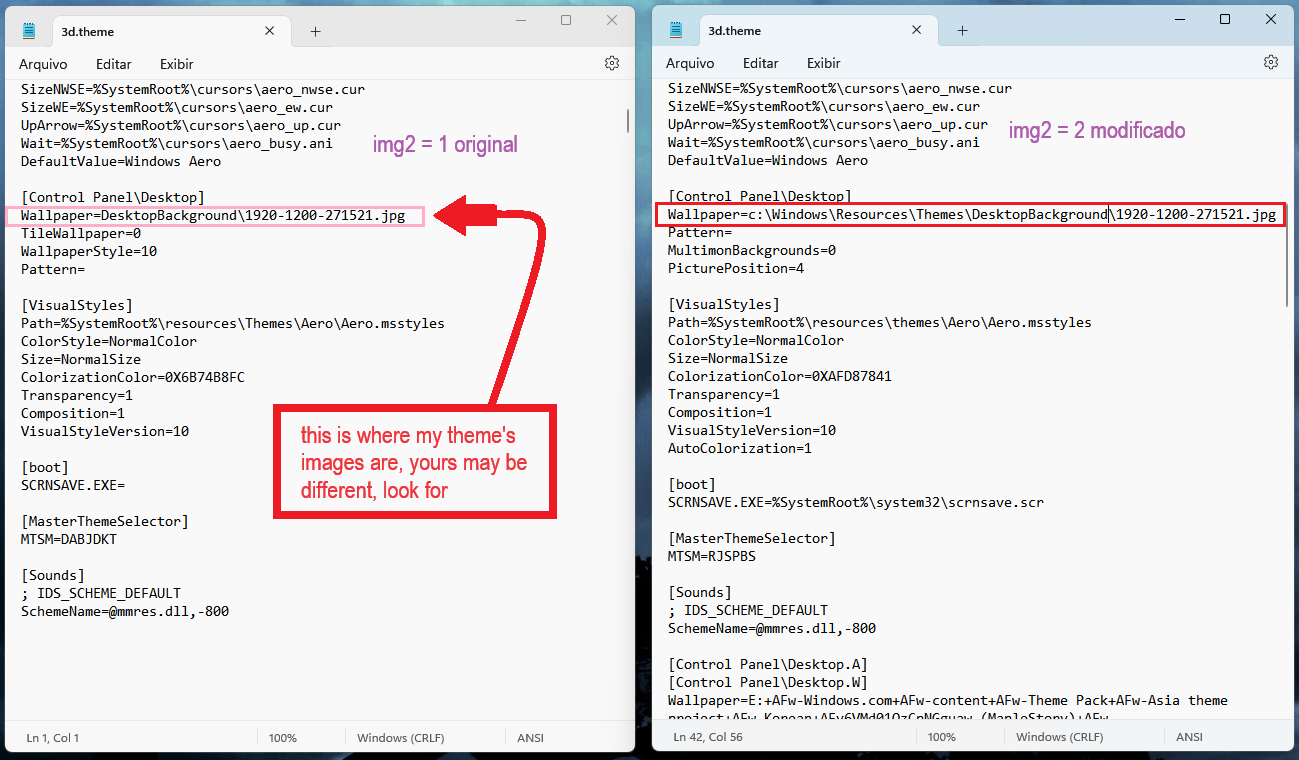
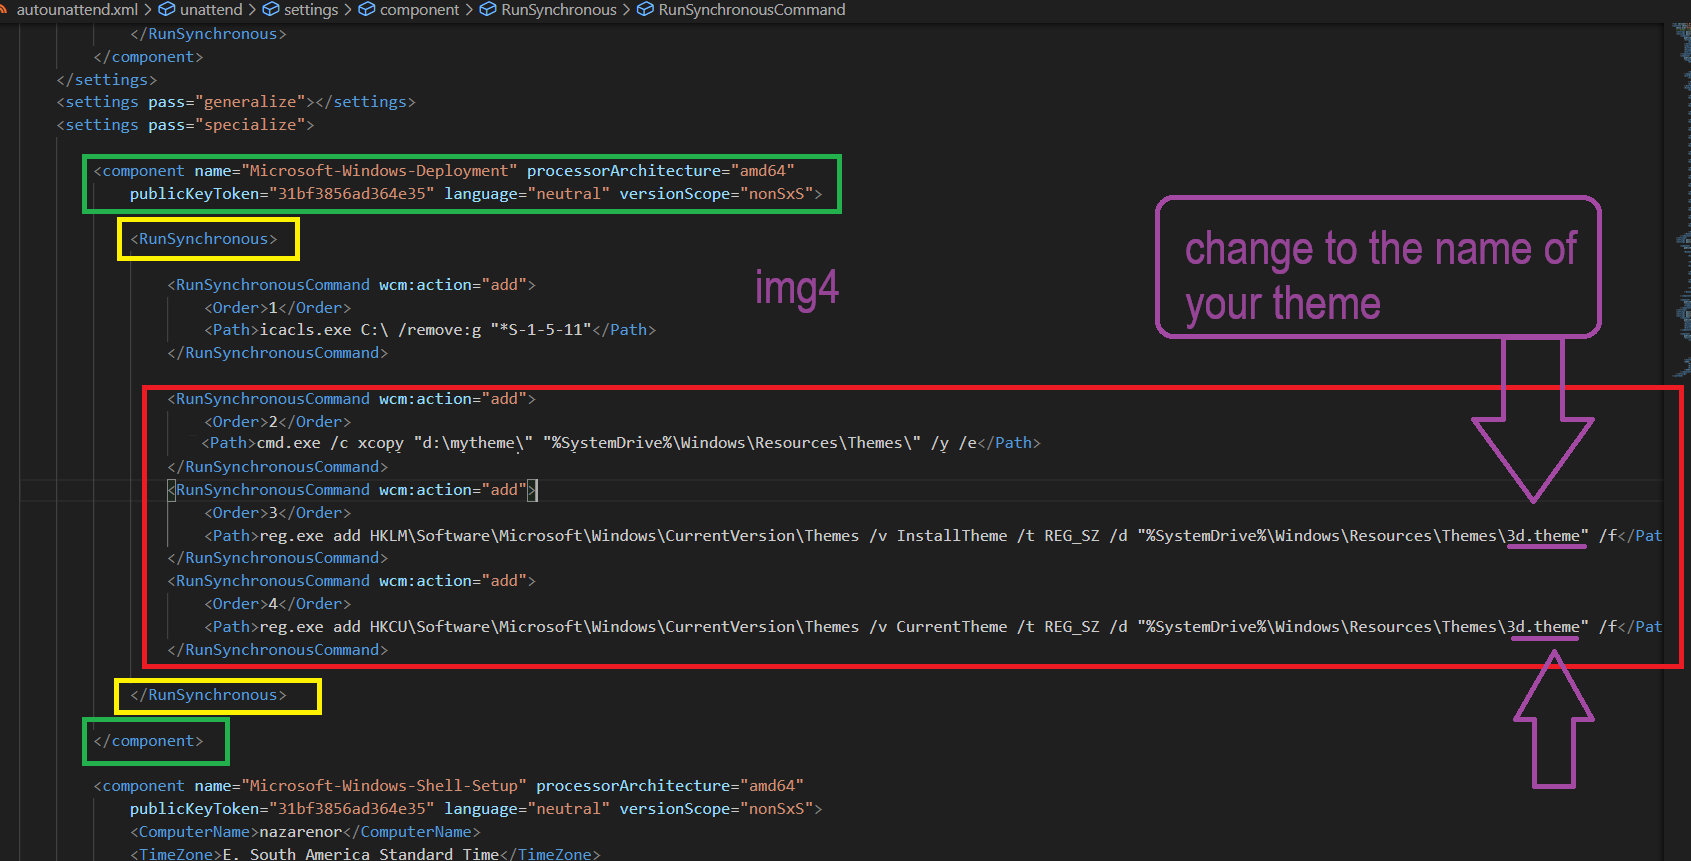
I know this post is old, but I've come from the future to bring you the solution for everyone. first of all you need to open the.theme file in notepad and change the path where the theme images will be to the default location where the standard microsoft themes are. see examples of how to do this in the images below. img1 shows how to extract the theme. open the 3d.theme file in notepad, you will need to change the default location where the images will be, because the default location where microsoft places its themes is: C:\Windows\Resources\Themes and that's exactly what you need to do, change the location of your background images to C:\Windows\Resources\Themes\DesktopBackground DesktopBackground is the folder where my theme's images are located. img2 = 1 shows the original theme file, img2 = 2 shows the modified file with the new location for the images. have you changed the path of your theme? test it, put it in the folder C:\Windows\Resources\Themes\ folder and run it to see if it works. Did it work? now on your bootable USB stick d:\mytheme\ add a folder to the root of your boot pendrive with the name mytheme and inside this folder place the file 3d.theme file and the DesktopBacground folder. in your case the name of your theme may be different and the name of the folder where the images are. It will look like this: D:\mytheme\3d.theme,DesktopBackground see example photo img3. now let's make the changes to your Autounattend.xml file in the part <settings pass="specialize"> this is where the magic will happen if you add the commands to copy your theme to the folder c:\Windows\Resources\Themes\ folder and change the regedit entries > HKLM\Software\Microsoft\Windows\CurrentVersion\Themes /v InstallTheme default :installtheme aero.theme to the name of your 3d.theme theme. the following commands should be added: in red on the img <RunSynchronousCommand wcm:action="add"> <Order>2</Order> <Path>cmd.exe /c xcopy "d:\mytheme\" "%SystemDrive%\Windows\Resources\Themes\" /y /e</Path> </RunSynchronousCommand> <RunSynchronousCommand wcm:action="add"> <Order>3</Order> <Path>reg.exe add HKLM\Software\Microsoft\Windows\CurrentVersion\Themes /v InstallTheme /t REG_SZ /d "%SystemDrive%\Windows\Resources\Themes\3d.theme" /f</Path> </RunSynchronousCommand> <RunSynchronousCommand wcm:action="add"> <Order>4</Order> <Path>reg.exe add HKCU\Software\Microsoft\Windows\CurrentVersion\Themes /v CurrentTheme /t REG_SZ /d "%SystemDrive%\Windows\Resources\Themes\3d.theme" /f</Path> </RunSynchronousCommand> two observations. First note: If there is no <component etc... in green you need to create and if there is no <RunSynchronous> in yellow you also need to create it. need to create in settings pass="specialize" <component name="Microsoft-Windows-Deployment" processorArchitecture="amd64" publicKeyToken="31bf3856ad364e35" language="neutral" versionScope="nonSxS"> <RunSynchronous> <RunSynchronousCommand wcm:action="add"> <Order>2</Order> <Path>cmd.exe /c xcopy "d:\mytheme\" "%SystemDrive%\Windows\Resources\Themes\" /y /e</Path> </RunSynchronousCommand> <RunSynchronousCommand wcm:action="add"> <Order>3</Order> <Path>reg.exe add HKLM\Software\Microsoft\Windows\CurrentVersion\Themes /v InstallTheme /t REG_SZ /d "%SystemDrive%\Windows\Resources\Themes\3d.theme" /f</Path> </RunSynchronousCommand> <RunSynchronousCommand wcm:action="add"> <Order>4</Order> <Path>reg.exe add HKCU\Software\Microsoft\Windows\CurrentVersion\Themes /v CurrentTheme /t REG_SZ /d "%SystemDrive%\Windows\Resources\Themes\3d.theme" /f</Path> </RunSynchronousCommand> </RunSynchronous> </component> Second note: your Paths cannot have line breaks, because cmd considers a line break as a new command, so before saving your Autounattend.xml, make sure there are no line breaks, leave your Autounattend.xml without line breaks. if there are line breaks, the specialize will fail.