Leaderboard
Popular Content
Showing content with the highest reputation on 08/16/2020 in all areas
-

All-In-One Disk Creator
Pommern Power reacted to Legolash2o for a topic
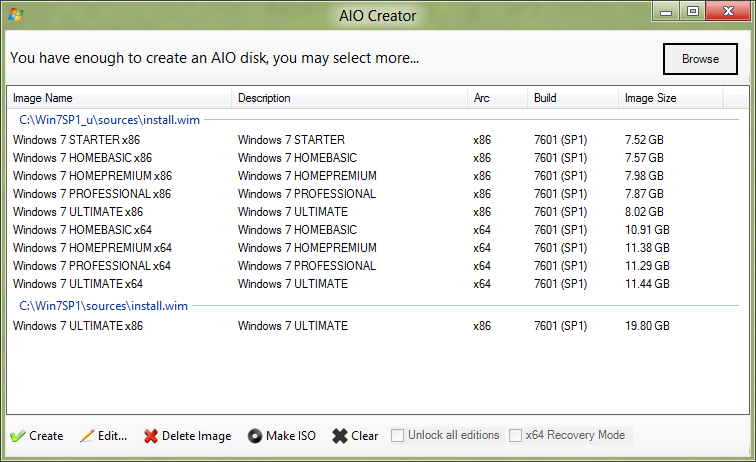
The 'All-In-One Disk Creator' lets you create all in one disks, so for example you can have Windows 7 SP1 x86 and Windows 7 SP1 x64 in disk, you could further include Vista or 2008 server if you wished. Step 1: Select your first image. Press the 'Browse' button and select your first install.wim, you should then see all the images get lists Step 2: Select your second image Press the 'Browse' button again and select your second image, you should now see even more images added. Optional 1: Add more images You can keep hitting browse and add more and more images until your ready. Optional 2: Delete the images you dont want! Step 3: Press Create W7T will then merge all of the images together, it will also try the best it can to resolve name conflicts however you may have to use the 'Edit' button and change some names to that NONE of them are the same, don't worry about descriptions, they won't conflict. WARNING: It is really important that none of the images have the same name, W7T will try for example add 'x64' or 'x86' to the names of the images to remove conflicts, however sometimes this is not enough. Optional: Rebuild You can choose to rebuild your newly created image so that it can produce a smaller ISO. Optional: ISO Maker Self-explanatory, make a new ISO with your new creation. Options Unlock All Editions Usually an image is locked to one edition i.e. Ultimate, so when it comes to install you don't have the option of choosing. Unlocking them will ask you which version of Windows you wish to install after booting from the ISO/USB. x64 Recovery Mode This will copy the 64bit Recovery Mode files, so if something happens to your computer and it's 64bit, you can use this option. 1 point